I’m back for another art piece breakdown. This time we’re gonna go through the Tupac picture I made and I’ll explain how I go from rough sketching to final piece. I’ll also explain the tools I used and the amount of time it took me to get this piece
done.
There’s always a reason to draw something. Whether the reason is minimal or well inspired, as long as it puts you in front of a piece a paper and gives you the urge to create, it’s a good thing. I decided to draw this Tupac piece because I had drawn a similar picture in 2012 where I made Tupac look older. At the time that picture was drawn, I was convinced it was one of my best pieces. Now that I look back, especially after everything I’ve learned through the past two years, and I can see that a lot of improvements were made, which is why I redrew this piece (in early 2015).
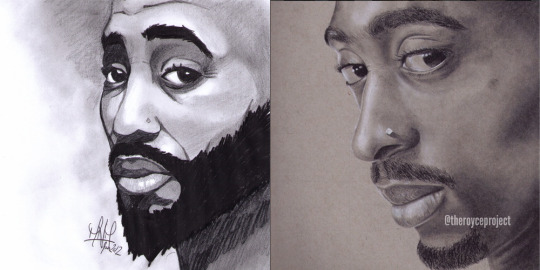
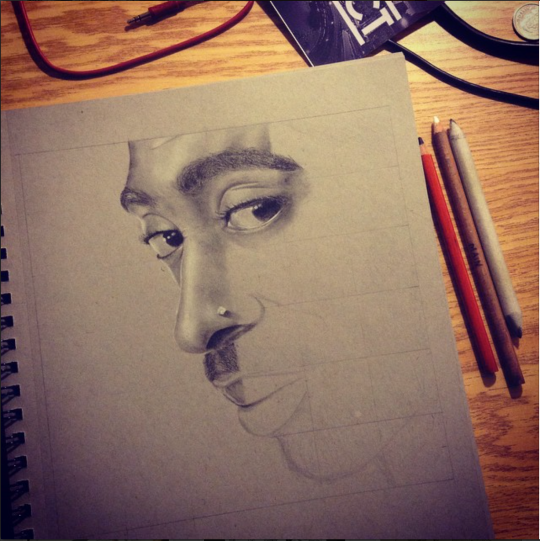
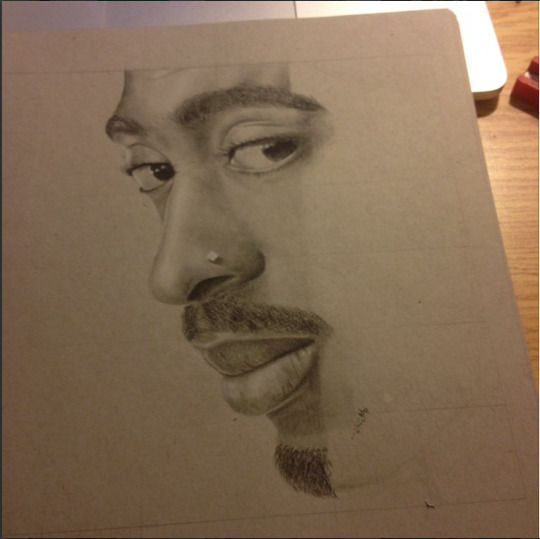
The first thing I noticed with the old picture was that the placement was off. I used a freehand method to draw a face, and I rushed the picture. To me the picture didn’t exactly look like Tupac in the 2012 version. I use the freehand method regularly, but I wasn’t careful with this one. I shaded the dark areas quickly and rushed the beard. Overall the piece took me about 4 hours to complete. Fast forward to now and you can tell it took me a lot longer to finish the new piece. I also paid more attention to details. I used the grid method again to get an accurate placement of Tupac and make sure his facial dimensions were precise. I took my time to make sure that the initial outline was drawn lightly so I could easily shade over it. But before I go on, I’m gonna get into some of the pencils and tools I used:
People always ask what pencils I use, when the right question should be what pencil scale do I use. This refers to using light, hard-tip pencils to using dark, soft-tip pencils. A good explanation of how these pencils work is on this link: http://pencils.com/hb-graphite-grading-scale/
I personally use Staedtler pencils that a friend gave me a few years back. For this pic I used a 2H pencils to make the grid and soft outlines, then I used a soft charcoal pencil, which is the equivalent to an 8B pencil to draw everything else. I also drew the pic on a grey scale paper (Strathmore Toned Grey Pad) so that I could use a white pencil and make the highlights stand out. All these things can be found at a local art store or amazon.com.
A trick I learned from another artist on IG is to never press hard on a pencil, whether it’s dark or light, but rather to go over the same lines or areas repeatedly until you get the result you want. I find that this helps correct errors too because if you need erase something, the pencil marks aren’t engraved in the paper. So I started shading the light areas first and moved into the dark ones. When you use really dark pencils, they smudge easily, but you can use that to your advantage. I’d make soft lines with my charcoal pencil and go over them with a q-tip, blending stump, or tissue paper to spread out the lead and cover more areas on the page. If I need to make a section darker I just keep repeating the same process until I get the darkness I want. I’ll press the pencil a little harder so that it can leave more lead on the page. Sometimes I’ll just scrape the charcoal on another paper, grab a q-tip, dab it in the lead, and draw with the q-tip.
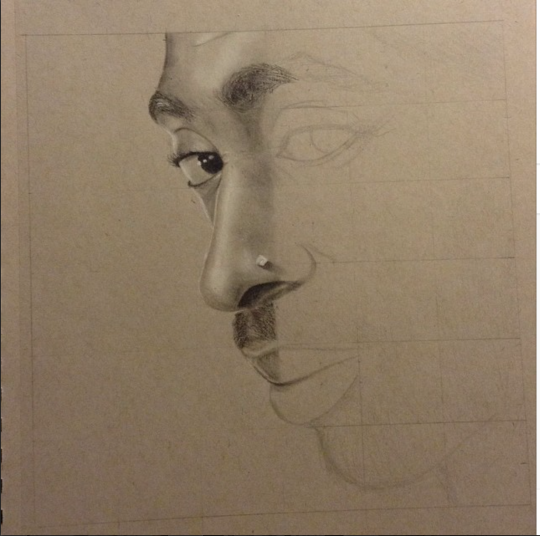
A good approach is to do the large shaded and light areas first, then work on the fine details after. I use this technique, but in chunks of squares from the grid. I’ll take 4 squares, for example, and do the shaded areas then add details later. Everyone has their own techniques. Once I started moving into the fine details, I had to be more patient. On my old Pac pic I just shaded the eyebrows and eyes quickly, while pressing extremely hard on the page, to get it done as quickly as possible. The beard was extremely rushed. This time I was able to grab a few hard-tip dark pencils and draw out individual details in the eyebrows, eyelashes, eyeballs, skin, facial hair, etc. You’re responsible for every single detail that shows up on a page, so if you don’t take the time to put them all in, you’re selling yourself short on your potential. I personally still don’t have the patience to add an extreme amount of detail in my work, but that’s me, and I’m working on improving.

Next was adding highlights to create the bright areas. That includes the reflection in the eyes, the nose-ring, etc. I used a white charcoal pencil, which I never knew how to use until I got this grey-scale paper. I just went over the areas that needed some highlighting until I got my desired results. On the skin I smudged the white charcoal over areas that needed highlight like the nose and forehead. These rules mentioned above apply throughout the drawing. I follow some people who put 50+ hours into each drawing, every time, and I applaud them because I know how tough that is. I usually put about 10-20 hours tops into drawings before I get distracted by another idea. The point is practice takes patience, and patience equals better results.
One last tool to mention is my pencil-eraser. It’s called a mono-zero eraser and it works like a thin marker. This tool lets you make adjustments to lines you’ve drawn that ended up being too thick, or it lets you erase areas that are too dark. You can also use the eraser to create a negative effect on darkly shaded areas. For example, the mustache on Pac, I used the eraser to create lighter individual strands by going over the dark ones I already drew. It’s very easy to add small details in skin and hair with this tool. Look it up on amazon, it’s usually cheap.
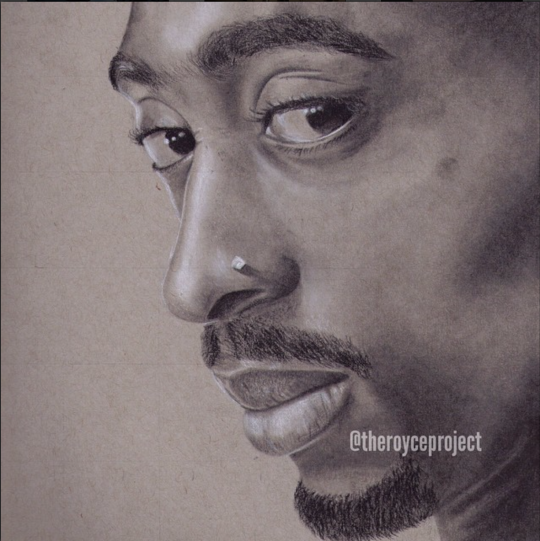
Finally, that takes us to the end of this breakdown. I’m actually not finished the picture, but I’ve done enough to put it up for sale. I think I put about 15 hours into this one so far. The intention is to add more skin details to make Tupac look older. That includes adding more beard details, more wrinkles and freckles, and more white hairs in the picture. I wanted to do it in phases that each looked like their own completed picture. I’ll eventually get around to making this happen and I’ll post it on my social media pages.
Also, a bonus, here are a few Instagram pages that I strongly suggest following. Each of them influenced me and helped me learn new things which helped me draw this picture:
@ashleycreations (amazing artist, followed me from the beginning, puts over 40 hours in each of her pieces)
@afjelnseth (learned about going over the same area multiple times from him)
@kit_king (unbelievable artist who shares many of her tips and knowledge)
@theillestrator (follows back, shading techniques are extremely impressive, very cool artist)
@damon__lucas (two underscores)(learned about the mono-zero eraser from him)
@kelvinokafor_art (master of realism with a pencil)
@ilovehash (master of realism with charcoal)
There are many more artists out there, but these are the most important ones to me. So I’m sure they could inspire anyone reading this article.
Remember to check out my Instagram page @theroyceproject, and also grab a copy of the Tupac picture from my shop.
Until next time.
Peace!
Royce